Truckcom is able to import data from CSV files and automatically create jobs in your system. As long as the layout of these files is always the same i.e the columns are always in the same order then the following set up process will only need to be followed once and then future files can easily be imported.
These can be done manually by uploading the file or automatically by sending the file as an attachment to a particular email address.
Importing jobs through this method will attempt to use any existing addresses in your system if they are found. If they do not exist then a new address will be created and used for the job.
You are also able to update existing jobs using the same method, where the job reference is used to locate existing jobs and these are then updated using the details from the file.
Setting up the import profile
To start with locate the customer the jobs should be imported for in the Companies grid in Truckcom. Right click on this customer row and select the Import Jobs option. If this option is not available please contact and administrator of your system who can add the option in using the Customise Menu option of the right click menu.

You will then be presented with the Import Jobs from CSV file screen.

This has a main grid on the left hand side where you can set up the field mappings that match up with the file you want to import and a right hand grid which lists all of the available Truckcom fields than you may wish to import data into.
The best way to get started is to select the CSV file you wish to use by clicking on the Select File button.

You will then see the content of this file displayed on the page underneath the Column Mapping area similar to the below.

The first time you do this you then need to set up the fields that map to these columns in the CSV file. You do not need to map a Truckcom field to every column if you do not need to import the data. Any that are not mapped will simply be ignored when the job is created.
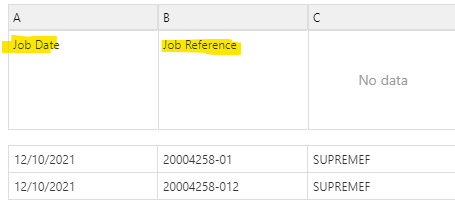
To do this simply locate the field from the grid on the right hand side and click and drag it into the column mapping area which starts off with “No data” shown. You can repeat this for as many fields as required and will end up with fields looking like this:

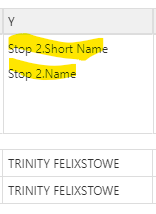
You can add multiple Truckcom fields to the same column if required. For example when importing an address you may wish to have the same value as the Address Name and Short Name (the Short Name in Truckcom is what is displayed on the jobs screen).

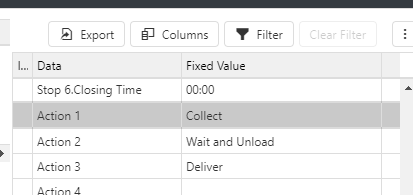
You can also set up some fields to be imported with Fixed Values if these do not exist in the CSV file and are the same for all jobs imported. For example they may all have the same Leg Type or Action. To do this you can simply enter the text value or select from the available options in the Fixed Value section of the right hand grid.

Required fields
There are several fields that must be imported in order for the jobs to be created correctly. Missing these out may result in jobs that appear incorrectly or are not visible at all through your Truckcom system. The required fields are:
Job Reference – a unique reference to identify this job. If an existing job is found it will be updated
Job Date
Leg Type – the type of job this is (e.g Import/Export etc)
Action 1-6 – depending on the number of stops you are importing the action that is performed at each of these is required
Combining multiple fields
There may be instances where you do not have a unique job reference, but a combination of two or three other fields could provide this. To cater for this requirement you will also see fields in the right hand grid Job Reference A and Job Reference B.
These can be set up in the same way as previously described. When the file is imported the value found in Job Reference will be combined with Job Reference A and Job Reference B. (Note this is the order they will be combined, if any of these are not mapped then they will just be excluded from this combination).
It may also be useful to do a similar combination of fields to construct and Address Street value. As above you will see fields Street, Street A, Street B and Street C. As above these will be combined in this order with the resulting data ending up in the Address Street field.
Manually importing data
Once the customer import profile has been set up additional files can be imported by following the same starting steps.
- Locate the customer in your system
- Right click and select Import Jobs
- Select and upload the file you wish to import
- Tick/Untick the File Includes Header Row box – if a header row is included this must be ticked or the import will fail
- Click the Import button
- Once completed a message will be displayed a long with any errors found (missing fields/incorrect data etc)

Automatically importing data
Once the above steps have been followed to create the customer import profile we can set up a specific email address that can then automatically pick up these files and import them to your Truckcom system following the same profile.
In order to get this set up please send a request to helpdesk@truckcom.co.uk including your company name and the customer you wish to set this import email address for. The email we create will be along the lines of {CustomerName}2{YourCompanyName}@truckcompdf.net
If you have any questions or require assistance setting these profiles up please do not hesitate to contact us.


