
Truckcom now offers the ability to schedule reports to be sent at a designated time and day. This feature is particularly useful for users who need to extract data from Truckcom at regular intervals without manual intervention.
Important Note: This feature will only generate and send the grid view that appears when you right-click on a report and select ‘View Grid’. It does not send the pivot table view that appears when selecting ‘View Report’.
Setting Up a Report Schedule
To set up a report schedule, follow these steps:
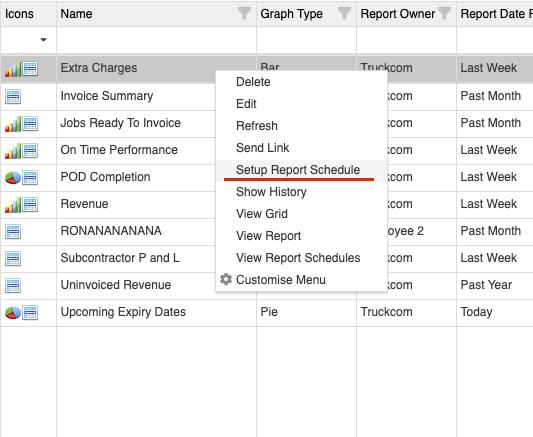
- Right-click on the desired report.
- Select “Setup Report Schedule” from the context menu, as shown below.
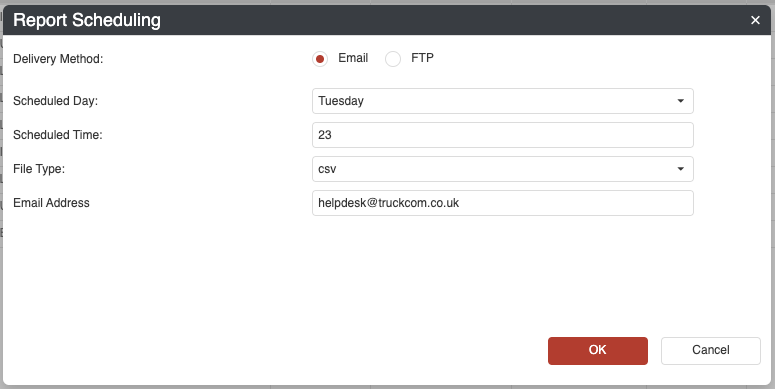
This action will open a form where you can configure the report schedule. The form includes the following options:
- Delivery Method: Choose how the report should be delivered (email or FTP).
- File Type: Select either CSV or XLSX as the preferred format.
- Scheduled Day: Use the dropdown menu to select the day of the week when the report should be sent.
- Scheduled Hour: Enter a number between 0 and 23 to specify the hour of the day when the report should be generated and sent.
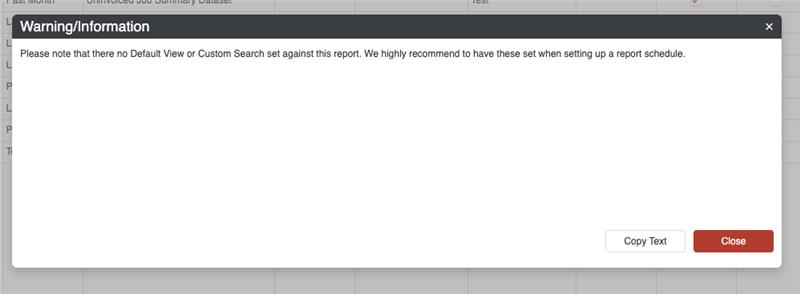
Best Practice Recommendation
Before setting up a schedule, it is advisable to:
- Define a default view for the report.
- Set up a custom search to filter out unnecessary columns, ensuring the generated CSV file only contains relevant data.
Viewing Report Schedules
Once you have configured a report schedule, you can review the setup:
- Right-click on the report.
- Select ‘View Report Schedules’ from the context menu.
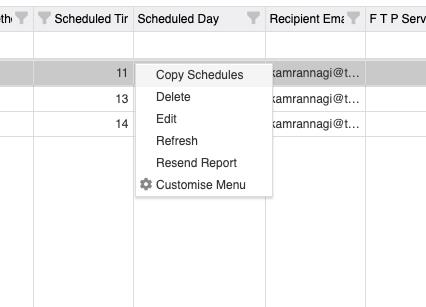
A new window will display all existing schedules for the selected report. Multiple schedules can be created for the same report, as shown in the example below.

Copying Report Schedules
If you need to replicate an existing schedule:
- Navigate to the ‘View Report Schedules’ grid.
- Right-click on an existing schedule.
- Select ‘Copy Schedules’.
This allows you to quickly duplicate schedules without manually re-entering details.
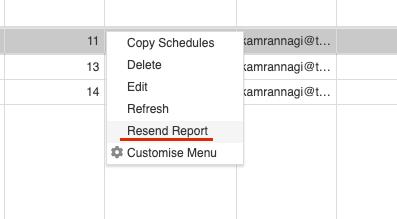
Resending a Report
If a scheduled report needs to be resent:
- Right-click on the report.
- Select ‘Resend Report’.
The report will be re-sent to the email address associated with the schedule, ensuring the recipient receives the latest data.
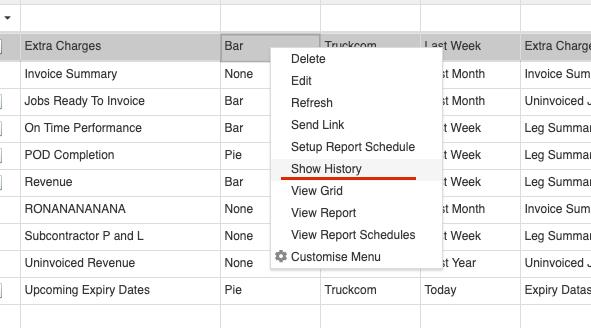
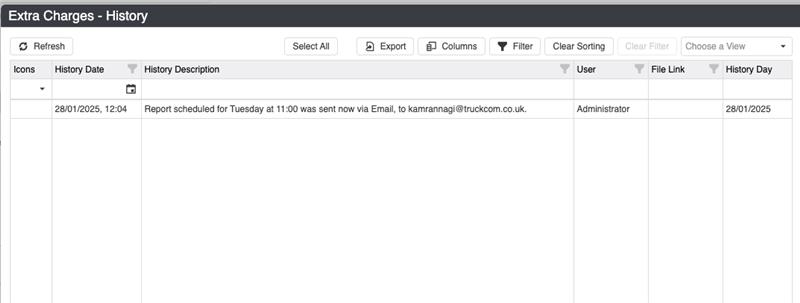
Report Schedule History
To track past scheduled reports:
- Right-click on the report.
- Select ‘Show History’.
This will display a log of previously sent reports, including timestamps and delivery details