
As an admin user, you are able to create customer logins within Truckcom XT following the steps below.
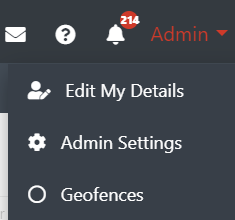
Once logged in hover over your username in the top right-hand corner. Select the option Admin Settings

From here select the Office Users tab

You should then see the Add Item button at the top of the office user’s grid.

Clicking on this will open up a new user form. Enter the details as required for this new customer. They will be able to change their password once logged in if required.
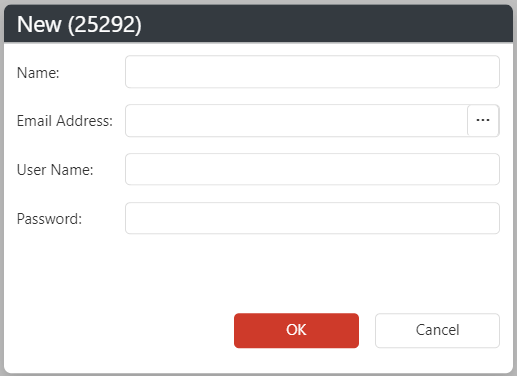
Once you have entered the details and click on the OK button you will see a new entry in the Office Users grid.
If you need to set any further details for the user, such as group filters, you can do this by right clicking on the user row and selecting the Edit option. You should then be able to locate the required fields and fill in the details needed here.
Alternatively, you can edit these in the grid, by locating the column and entering the required data directly into it.
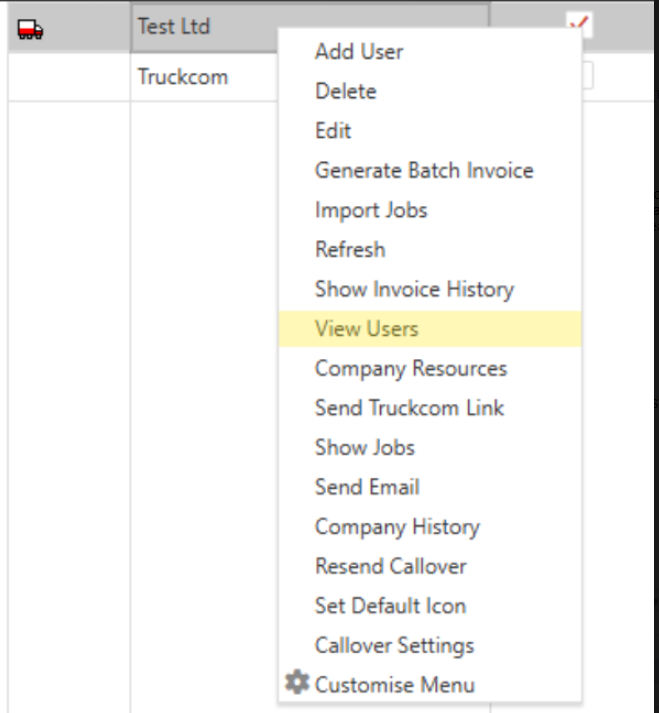
Next, go to the relevant company that the user should be assigned to. Right-click and select “View Users”.

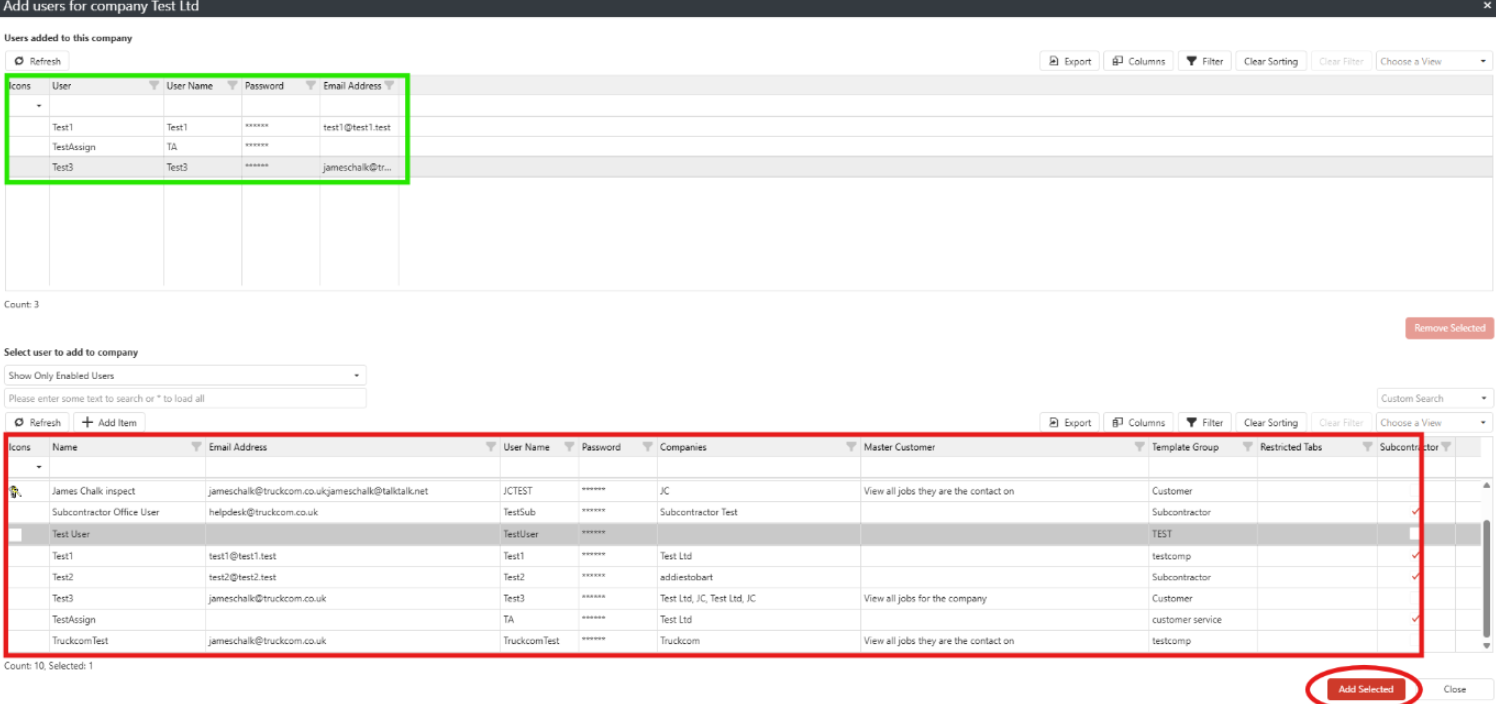
A popup will appear with two grids:
• The top grid shows users currently assigned to the company (this may be blank if no customer logins exist yet).
• The bottom grid lists all users. Select the user you want to assign and click the “Add Selected” button at the bottom right. This will move them to the top grid.

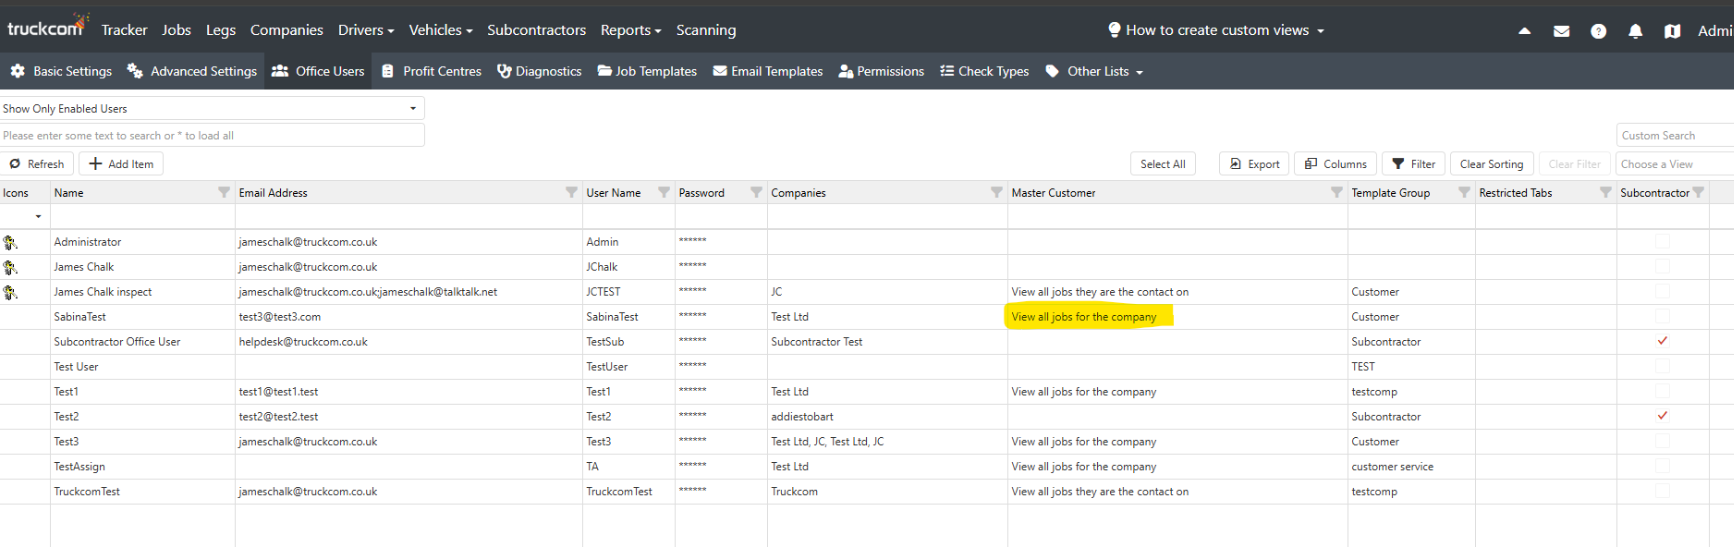
After adding the user to the company, you’ll see a column indicating which companies each user is assigned to.

Ensure the “Master” column for the user is set to “View all jobs for the company”. If it says something else (e.g., “View all jobs they are the contact on”), change it back to “View all jobs for the company”.

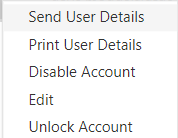
Finally, you can use the Send User Details right click option (on the newly created customer) to email the customer their newly created username and password. The email will include a link to Truckcom so they can get started using the system

As an admin user, you are able to create customer logins within Truckcom XT following the steps below.
Once logged in hover over your username in the top right-hand corner. Select the option Admin Settings
From here select the Office Users tab

You should then see the Add Item button at the top of the office user’s grid.
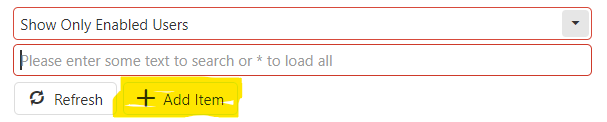
Clicking on this will open up a new user form. Enter the details as required for this new customer. They will be able to change their password once logged in if required.

Once you have entered the details and click on the OK button you will see a new entry in the Office Users grid.
If you need to set any further details for the user, such as group filters, you can do this by right clicking on the user row and selecting the Edit option. You should then be able to locate the required fields and fill in the details needed here.
Alternatively, you can edit these in the grid, by locating the column and entering the required data directly into it.
Next, go to the relevant company that the user should be assigned to. Right-click and select “View Users”.
A popup will appear with two grids:
• The top grid shows users currently assigned to the company (this may be blank if no customer logins exist yet).
• The bottom grid lists all users. Select the user you want to assign and click the “Add Selected” button at the bottom right. This will move them to the top grid.
After adding the user to the company, you’ll see a column indicating which companies each user is assigned to.

Ensure the “Master” column for the user is set to “View all jobs for the company”. If it says something else (e.g., “View all jobs they are the contact on”), change it back to “View all jobs for the company”.
Finally, you can use the Send User Details right click option (on the newly created customer) to email the customer their newly created username and password. The email will include a link to Truckcom so they can get started using the system